Hi, friends!

We are very excited to show you some stuff we’ve been doing outside our main project, Degrees Of Separation!

Norwegian nationals in gameplay happened last week, and we participated as we normally do. We talked about it before (we won last year!!), it’s a game jam hosted by the Norwegian film institute (NFI) that awards 100.000 NOK to the winner to be invested in a game production.

The theme this time was ‘Fear’, a challenging one in our opinion. We made a game called “Myco”, a platformer based on the use of light to progress and avoid enemies that feed on fear, which the protoganist get if he is in darkness or something scary happens to him.

The game features a mysterious person in a mysterious place where special mushrooms live. These entities produce light in many ways: some are static while others emit brightness for just a few seconds. There’s even one you can pick up and use as a flashlight.

But something else exist in this place.

There are unknown monsters that want to use our fear to get stronger and finally capture us. Fortunately, they are afraid of light, and we can ‘fight’ them using the mushrooms that cover the place. Or, at least, make them retreat so we can advance and maybe realize finally where we are.

A lot of cool games were presented in the contest, showing how strong the Norwegian industry is. We want to congratulate Rock Pocket for taking the award this year with their awesome VR proposal!

Hello, friends!

As we told you on the last post, SpillExpo happened some weeks ago. And it was fantastic!

We spent three days showing our game on two stations: one with a couch and another one with two stools, a blue one and a red one, representing our two characters of Degrees of Separation.

Friday was the opening day, and people were a bit more shy and curious about the game. We had a big TV on the corner of our booth showing gameplay, and people used to stop and watch, attracted by the colors and the temperature transition that made them want to try themselves.

Saturday was quite crazy in comparison. The amount of visitors raised in general, but the ones wanting to play our game became so high that we had to use duct tape on the floor to improvise a queue that sometimes was getting out of our area. People really enjoyed playing with the temperature to solve the puzzles. Some just wanted to experience the game a little bit, while some others (my favourite ones) really got engaged and, obstinately, tried to get every single scarf of the demo. We had candy for the ones succeeding.
Of course, the players trying to uncover all the game nooks and crannies where the ones that loved it most, and will remember the game as a great experience they are really looking forward to play it in its entirety.

Sunday was kind of a mix between Friday and Saturday. There was a lot of people, but not as much as the day before. We were able to enjoy the expo a bit more and take it as a relaxing day.

Thanks to everyone that came and tried our game, we felt very well received! Having queues of people waiting to play Degrees of Separation was awesome and made us very happy, and we got pretty good feedback also. It seems visitors really liked the demo, and that is the best reward we can have after all the hard work.

We’ll keep up the good work and continue focusing making the game. Stay tuned for more news!

We are finally back with #BloggingThursday! Still working like if there was no tomorrow, but we have some very good news to tell you, so here is a small update on how and what we’re doing.

SpillExpo is the biggest gaming fair in Norway. It happens around November and gathers thousands of enthusiasts every year, and the number of visitors increases with each issue. This year, the event takes places 11 – 13 November.

Like the last time, we are going to be there showing a demo of Degrees of Separation, including the most recent improvements. As you know, we’ve been putting our souls into the project and squeezing our brains to progress as much as we can, and we think you are going to love the current state of the game.

We’ll hold a new contest, and everyone coming to see us can participate and get a chance to win a copy of Degrees of Separation when it’s released. Stickers, conversations and hugs are for free, so come see us, try our game and share our excitement!

I’ve read and heard from many sources that starting a blog post with a definition or a quote from places like Wikipedia is a bad practice. I really don’t understand why, especially when the post is about something not everybody knows the meaning of. Because of this reason, and in addition to the fact that we shouldn’t take most of internet blogs that seriously, I’m going to quote Wikipedia, regarding what “crunch” is:


“Crunch time” is the point at which the team is thought to be failing to achieve milestones needed to launch a game on schedule. The complexity of work flow and the intangibles of artistic and aesthetic demands in video-game creation create difficulty in predicting milestones.

(…)

The protest against crunch time was posted by Erin Hoffman (fiancee of Electronic Arts developer Leander Hasty), who contended that her life was being indirectly destroyed by the company’s work policy. (…) As senior game developers age and family responsibilities become more important, many companies are moderating the worst crunch-time practices to attract better-quality staff.

computer


My personal experience in the video-game industry is not very extensive, so maybe you could consider my opinion inaccurate, but I think that this thought around what “crunch” means is pretty aggressive. I can understand that big companies may be a bit more pushing to their workers, and more strict deadlines may put them on the ropes harder than small studios like us, which might be the cause for that negative meaning.

In our case, we are going to crunch for the next few weeks, but we are happy to do it. The definition from our side may differ a bit from the one Wikipedia mentions, but the essence is comparable.

We don’t do it because of deadlines, though. We are not failing to achieve a milestone (yet). Although it is very true that predicting milestones in the game industry is like planning your life 5 months onward. It’s a very nice exercise, but don’t expect things to be the way you wrote down.

Do you know what happens when a car gets stuck into the sand at the beach? It doesn’t matter how hard you step on the gas pedal, the car will not move at all, and even worse, the sand spreads, creating a hole that makes it even more difficult to escape. I am from Valencia, in Spain, and I’ve seen that many, many times. The solution is to get out of the car and push together from behind, using a bit of extra, synchronized, combined strength. Once the car is out of the excess of sand, it can go back to its path and continue the journey normally and happily.

We are going to spend some time putting quite a lot of extra effort, while having a clean and focused mind, combine our forces and make a great push to remove the excess of sand that would get us stuck. Better safe than sorry. This crunch is going to help us gain a lot of momentum to progress on the game and have it finished with the quality and love we always wished. We will work, eat pizza, and sleep over the pizza boxes for some days. It’s going to be awesome!

hammers

The bad news is that the blog will take a break for a few weeks, hopefully not more than three. We need to be 100% focused on the game and absolutely nothing else.

The good news is that the game is so far being molded the way we totally want, exceeding or standards (which for some of us are very high) , and we are looking forward to have you guys play it. We know you are going to love it.

See you soon!

A new interview is here! Let’s talk with Fuglesang:

20160220-Splashjam 2016-36-3

Tell us who you are and what do you do on the team.

Hi, I’m Andreas. I’m the CEO but also work as a programmer. I co-founded Moondrop in late 2009 and took over the role as CEO in 2011.


What is the most difficult part of your job?

Since I function as two roles in the company, it can be hard to juggle priority between tasks. Sometimes both roles require immediate attention which in turn makes everything just take more time.


And the part you enjoy the most?

My heart lies with programming so that is definitely the part I enjoy the most. Finding simple solutions to complicated problems and writing understandable and maintainable code is what I strive for. Over the years I’ve become less tolerant of over-engineered code unless it has a known purpose in the future and must be that way. I mostly thank attending Game Jams for this as it helps me stay pragmatic.


You made your own engine in the past, and now you are using Unity. What are the pros and cons of one way and the other?

Today, 3rd party game engines are so mature that there are few reasons to write your own. There are even different engines for various skill level and ambitions. The big disadvantage of using 3rd party engines is the potentially long wait for bugs to get fixed and features to be added, and that can delay your own progress. But it’s insignificant compared to the time it takes to write your own engine. I think you should only write your own because of these reasons:

  • To learn about the inner workings of a game engine.
  • Your game needs a feature that a 3rd party engine doesn’t have and can’t support.
  • You have the knowledge and skill required to make an engine (you probably don’t).
  • You have a lot of time and money, and one of the above is true.


What IDE (Integrated development environment) you use? What are your favorite add-ons and for it? How do they help you on your task?

With Unity, I use Visual Studio because of its no-fuzz integration. Just install them and start working. But my favorite ones to use for everything else is Sublime Text and Atom. I like how bare-boned they are and that you can simply add the features you need. Amphora was written using only Sublime Text.

My favorite add-ons:


What feature of Degrees of Separation do you feel more proud of?

There is no particular feature I feel more proud of as I think most of it is (and forever will be) half-finished. If anything it might be what I call “SimpleState” which is in practice a state machine. It’s simple (hence the name) but has a lot of utility if used correctly, especially to write maintainable code.

using UnityEngine;
using System;

[Serializable]
public class SimpleState<T> where T : struct, IComparable, IConvertible, IFormattable
{
	[SerializeField]
	private int _state = 0;
	[SerializeField]
	private int _previous_state = 0;

	public int value { get { return _state; } }
	public int previousValue { get { return _previous_state; } }
	public int count { get { return _Count( _state ); } }
	public int previousCount { get { return _Count( _previous_state ); } }

	public EnumState( )
	{
		//--
	}

	public EnumState( T state_ )
	{
		Set( state_ );
	}

	public void Clear( )
	{
		_previous_state = _state;
		_state = 0;
	}

	public void Set( T state_ )
	{
		_previous_state = _state;
		_state = Convert.ToInt32( state_ );
	}

	public void Add( T state_ )
	{
		_previous_state = _state;
		_state |= Convert.ToInt32( state_ );
	}

	public void Remove( T state_ )
	{
		_previous_state = _state;
		_state &= ~Convert.ToInt32( state_ );
	}

	public void Toggle( T state_ )
	{
		_previous_state = _state;
		_state ^= Convert.ToInt32( state_ );
	}

	public bool Is( T state_ )
	{
		return (_state & Convert.ToInt32( state_ )) != 0 ? true : false;
	}

	public bool IsOnly( T state_ )
	{
		return _state == Convert.ToInt32( state_ ) ? true : false;
	}

	public bool IsNone( )
	{
		return _state == 0 ? true : false;
	}

	public bool Was( T state_ )
	{
		return (_previous_state & Convert.ToInt32( state_ )) != 0 ? true : false;
	}

	public bool WasOnly( T state_ )
	{
		return _previous_state == Convert.ToInt32( state_ ) ? true : false;
	}

	public bool Any( )
	{
		return _state != 0 ? true : false;
	}

	public bool WasAny( )
	{
		return _previous_state != 0 ? true : false;
	}

	new public string ToString( )
	{
		char[] b = new char[32];
		int pos = 31;
		int i = 0;

		while( i < 32 )
		{
			b[pos] = (_state & (1 << i)) != 0 ? '1' : '0'; pos--; i++; } return new string( b ); } private int _Count( int state_ ) { int i = state_; i = state_ - ((i >> 1) & 0x55555555);
		i = (i & 0x33333333) + ((i >> 2) & 0x33333333);
		return (((i + (i >> 4)) & 0x0F0F0F0F) * 0x01010101) >> 24;
	}
}

using UnityEngine;
using System.Collections;

public enum PlayerStates
{
	None = 0,
	Idle = 1<<0,
	Walk = 1<<1,
	Jump = 1<<2
}

public class EnumStateTest : MonoBehaviour
{
	private EnumState<PlayerStates> _state;

	private void Start( )
	{
		_state = new EnumState<PlayerStates>( PlayerStates.Idle );
	}

	private void Update( )
	{
		// Check if player wants to/can jump
		// Check if player wants to/can move

		if( _state.Is( PlayerStates.Jump ) )
		{
			if( _HasLanded( ) )
			{
				if( _PlayerWantsToMove( ) )
				{
					_SetAnimation( PlayerStates.Walk );
					_state.Set( PlayerStates.Walk );
				}
				else
				{
					_SetAnimation( PlayerStates.Idle );
					_state.Set( PlayerStates.Idle );
				}
			}
			else
			{
				_ApplyDrag( );
			}
		}
		else if( _state.Is( PlayerStates.Walk ) )
		{
			if( _PlayerStoppedMoving( ) )
			{
				_SetAnimation( PlayerStates.Idle );
				_state.Set( PlayerStates.Idle );
			}
			else
			{
				_ApplyMovement( );
			}
		}
		else if( _state.Is( PlayerStates.Idle ) )
		{
			if( _PlayerWantsToJump( ) )
			{
				_AddJumpForce( );
				_SetAnimation( PlayerStates.Jump );
				_state.Set( PlayerStates.Jump );
			}
			else if( _PlayerWantsToMove( ) )
			{
				_ApplyMovement( );
				_SetAnimation( PlayerStates.Walk );
				_state.Set( PlayerStates.Walk );
			}
		}
	}
}


What is that amazing thing about Degrees of Separation you love the most?

The broad range of people that can play the game. It’s purposefully designed this way since we take inspiration from how Disney, Pixar, Nintendo and others make their products, and how well the concept works for this is amazing.

I also have high expectation of the combination of how the exploration and the puzzles will work together. This has not been fulfilled quite yet and I’m excited to see when we get closer to completing the game.


Share a screenshot you love, and tell us why. It can be inside Unity Editor, in-game, or showing your favorite software tool!

IMG_07012014_012104

The original character art made by Monica Rong (http://monicarong.no/) in cooperation with Owe has been my favorite one since we started with the concept. To me, it perfectly portrays the vision, and it’s the soul of the game.

Hi, friends! Wanna have another shader session?

Today, we want to show you our approach to make colored fog in Degrees of Separation. You can use this tutorial to make your own fog in your 2D game.

This is not only regular fog that makes objects disappear with distance, but an artistic technique to make your scenery acquire beautiful color tones: Maybe you want to warm it up, making orange fog, or you wish to add a layer of mystery using fog with green tones. You can also use gray tones that will apply normal fog to the scene.

To make the fog happen, we will make a component with adjustable parameters, and a second component that gathers information about the object on which we will apply the fog. Then we’ll send all that to a shader that will change the colors of that object depending on the parameters entered and the position of the object in 3D space.

Setting up a scene

Let’s start with an empty scene. Add any kind of sprite in the center. One sprite is enough for the moment.

We also need an empty game object that can work as a game manager. We will add the component to change our fog settings to this object.

The Fog Data Script

The following script makes up the component for FogData. It will be added to the game manager object. It is a Singleton, by the way, so we can call it without getting a reference, since it would be unique:

using System;
using UnityEngine;

//http://wiki.unity3d.com/index.php/Singleton
public class FogData : Singleton&amp;amp;amp;amp;amp;lt;FogData&amp;amp;amp;amp;amp;gt;
{
#if UNITY_EDITOR
	#region Actions
	public event Action OnChange;
	#endregion Actions	
#endif

	#region InspectorFields	
		
	[Header( "Boundaries" )]
	public Vector2 fogBack = new Vector2( 0f, 50f );
	public Vector2 fogFront = new Vector2( 0f, 1f );
	public Vector2 verticalSplit = new Vector2( 0f, 1f );

	[Header( "Fog Map" )]
	public bool useTexture = true;
	//Texture should be 4 pixels width, the order of columns should be backBottom, backTop, frontBottom, frontTop
	public Texture2D fogRampTexture;

	
	[Header( "Colors" )]
	public Gradient backBottom;
	public Gradient backTop;
	public Gradient frontBottom;
	public Gradient frontTop;
	
	public int colorsResolution = 100;
	#endregion InspectorFields

	#region PrivateFields
	private Texture2D _generated_texture;
	#endregion

	#region Accessors
	//This tell us if we should activate or deactivate the effect.
	//Not only enabling or disabling the component acts on the effect activation; 
	//for example, if fog back minimum is higher than maximum, the effect gets deactivated automatically.
	public bool Activated
	{ get; set; }
	#endregion Accessors

	#region Unity
#if UNITY_EDITOR
	//Calling something changed if the component is activated or deactivated, so we can see the effect right away on the scene
	private void OnEnable( )
	{
		if( OnChange != null )
		{
			OnChange( );
		}

		OnChange += _UpdateFogFromSettings;
	}

	private void OnDisable( )
	{
		if( OnChange != null )
		{
			OnChange( );
		}

		OnChange -= _UpdateFogFromSettings;
	}
#endif

	private void Awake( )
	{
		_UpdateFogFromSettings( );
    }
	#endregion Unity

	//This makes sense only in editor.
#if UNITY_EDITOR
	#region Events
	//This will be called from the editor script when something in the inspector changes
	public void CallOnChangeEvent( )
	{
		if( OnChange != null )
		{
			OnChange( );
		}
	}

	//Redo the texture and recheck if the component should be activated or not
	private void _UpdateFogFromSettings( )
	{
		if( !useTexture )
		{
			_MakeTextureFromColors( );
			fogRampTexture = _generated_texture;
		}

		_UpdateActivated( );
	}
	#endregion Events
#endif

	#region LocalMethods
	private void _UpdateActivated( )
	{
		bool fog_back_min_bigger_than_max = fogBack.x &amp;amp;amp;amp;amp;gt;= fogBack.y;
		bool fog_front_min_bigger_than_max = fogFront.x &amp;amp;amp;amp;amp;gt;= fogFront.y;

		if( !fogRampTexture || fog_back_min_bigger_than_max || fog_front_min_bigger_than_max )
		{
			Activated = false;
		}
		else
		{
			Activated = true;
		}
	}

	private void _MakeTextureFromColors( )
	{
		if(!_generated_texture)
		{
			_generated_texture = new Texture2D( 4, colorsResolution, TextureFormat.ARGB32, false );
		}

		//Properties to make the texture work properly
		_generated_texture.wrapMode = TextureWrapMode.Clamp;
		_generated_texture.anisoLevel = 0;
		_generated_texture.filterMode = FilterMode.Point;

		//Correct order to make the columns in the texture. If we make a manual texture we should follow the same structure.
		Gradient[] colors = { backBottom, backTop, frontBottom, frontTop };

		//Create a 4 by colorsResolution pixel texture, running through all gradients with the order above.
		for( int j = 0; j &amp;amp;amp;amp;amp;lt; 4; j++ )
		{
			Gradient current = colors[j];

			for( int i = 0; i &amp;amp;amp;amp;amp;lt; colorsResolution; i++ )
			{
				_generated_texture.SetPixel( j, i, current.Evaluate( 1 - ( i / (float)colorsResolution ) ) );
			}
		}

		//Apply changes to the texture
		_generated_texture.Apply( );
	}
	#endregion LocalMethods
}

After adding this script, we will have some parameters in the inspector, like this:

We can make it more organized, and hide the gradients if we toggled on Use Texture, since we won’t use them in that case. We can hide the texture also if it’s toggled off.
Apart from that, we need to catch when a change is made in the inspector to refresh the effect while the game is being played in the editor to test on the fly. We should call CallOnChangeEvent method that is in FogData when a change is made. Let’s do all that in an Editor Script, FogDataEditor. We don’t need to add this script anywhere, but we need to put it inside a folder called Editor for Unity to understand that the script is an editor extension:

using UnityEditor;

[CanEditMultipleObjects]
[CustomEditor( typeof( FogData ) )]
public class FogDataEditor : Editor
{
	//Boundaries
	private SerializedProperty fogBack_prop;
	private SerializedProperty fogFront_prop;
	private SerializedProperty fogVertical_prop;

	//Toggle
	private SerializedProperty useTexture_prop;

	//Texture
	private SerializedProperty fogRampTexture_prop;

	//Colors
	private SerializedProperty colorsResolution_prop;

	private SerializedProperty backBottom_prop;
	private SerializedProperty backTop_prop;
	private SerializedProperty frontBottom_prop;
	private SerializedProperty frontTop_prop;

	//target
	private FogData _data;

	#region Unity
	private void OnEnable( )
	{
		_data = target as FogData;

		//Boundaries
		fogBack_prop = serializedObject.FindProperty( "fogBack" );
		fogFront_prop = serializedObject.FindProperty( "fogFront" );
		fogVertical_prop = serializedObject.FindProperty( "verticalSplit" );

		//Toggle
		useTexture_prop = serializedObject.FindProperty( "useTexture" );

		//Texture
		fogRampTexture_prop = serializedObject.FindProperty( "fogRampTexture" );

		//Colors
		colorsResolution_prop = serializedObject.FindProperty( "colorsResolution" );

		backBottom_prop = serializedObject.FindProperty( "backBottom" );
		backTop_prop = serializedObject.FindProperty( "backTop" );
		frontBottom_prop = serializedObject.FindProperty( "frontBottom" );
		frontTop_prop = serializedObject.FindProperty( "frontTop" );
	}

	public override void OnInspectorGUI( )
	{
		serializedObject.Update( );

		EditorGUI.BeginChangeCheck( );

		//Boundaries
		EditorGUILayout.PropertyField( fogBack_prop );
		EditorGUILayout.PropertyField( fogFront_prop );
		EditorGUILayout.PropertyField( fogVertical_prop );

		//Toggle
		EditorGUILayout.PropertyField( useTexture_prop );

		//Hide and show depending on the toggle
		if( useTexture_prop.boolValue )
		{
			//Texture
			EditorGUILayout.PropertyField( fogRampTexture_prop );
		}
		else
		{
			//Colors
			EditorGUILayout.PropertyField( colorsResolution_prop );

			EditorGUILayout.PropertyField( backBottom_prop );
			EditorGUILayout.PropertyField( backTop_prop );
			EditorGUILayout.PropertyField( frontBottom_prop );
			EditorGUILayout.PropertyField( frontTop_prop );
		}

		if( EditorGUI.EndChangeCheck( ) )
		{
			serializedObject.ApplyModifiedProperties( );
			_data.CallOnChangeEvent( );
		}
	}
	#endregion Unity
}

Now, your inspector should look like this:

Use Texture toggled off

Use Texture Toggled on

You may have seen that we have 2 types of fog. Fog Back is for objects that are behind in the scene. Fog Front is for objects that are between the camera and the main part of the scene.

So, now, the inspector shows all these options for us to tweak:

  • Fog Back and Fog Front (Vector2): The fog in the back starts in X and finishes in Y. If we had a gradient that goes from green to red, everything with a z coordinate of the X value of the vector or less will be green; everything with a Z coordinate of the Y value of the vector or more will be red, and everything with a Z coordinate that is between X and Y will follow the gradient.
  • Vertical Split (Vector2): We have 2 colors that blend for both fogs. Everything that has an Y coordinate of X or below will have bottom color, everything that has a coordinate of Y or higher will have top color. Everything between X and Y will blend top and bottom colors like a gradient.
  • Use Texture (bool): If this is on, we can add a texture that will be made manually. The texture should have a width of 4, being each column a fog in this order: fogBackBottom, fogBackTop, fogFrontBottom, fogFrontTop. If the toggle is off, we can select these 4 colors with gradients.
  • Fog Ramp Texture (Texture2D): If Use Texture is on, we set here the texture we made manually.
  • Back Bottom, Back Top, Front Bottom, Front Top (Gradient): We choose the colors that will be used in the texture. In the back fog, the gradient left part is the closest to the camera, the right part is the further. In the front fog goes to the other direction, from the action towards the camera. These will be visible only if Use Texture is off.
  • Colors Resolution (int): This sets how many Y pixels our texture has. The more pixels, the smoother the gradient for the fog will be. It only works if Use Texture is off.

Fog is always applied between Fog Back or Fog Front vector elements (x and y). The gradient will then act depending on the position between the components of the vector. The alpha of the gradient will decide how much fog is applied. An alpha of 0 is not applying fog at all, an alpha of 255 is applying Fog and removing all colors and details of the object. A normal thing to do is to put Alpha 0 to the left side of the gradient, and Alpha 255 to the right.

Applying fog to objects

Of course, this is doing nothing by itself. We now need a script that will be added to every object that we want to be affected by fog.This script will send the Fog Texture and the position to the shader. The Z position is pre-calculated based on the values from FogData so we avoid spending time on that in the shader. Add this script as a component to all objects (with sprites) you want to be affected by fog. It just gets FogData options, make proper calculations depending on the Z position of the object, pack everything in a Vector3 and send it to the shader together with the fog map that has been dynamically created or manually made:

using UnityEngine;

public class Fog : MonoBehaviour
{
	#region Const
	const string ON_KEYWORD = "_FOG_ON";
	const string OFF_KEYWORD = "_FOG_OFF";
	#endregion

	#region PrivateFields
	//Shader Property Ids. It's always better to use id's than to send strings to the shader.
	private int _01_fog_depth_verticals_prop;
	private int _fog_texture_prop;

	//We use this to update fog if an object changes Z position.
	private float _previous_z;

	private Renderer _rend;
	private Material[] materials;

	private bool previous_activation_state;
	#endregion PrivateFields

#region Unity
#if UNITY_EDITOR
	//We subscribe to OnChange to update Fog if the inspector had changes. This only makes sense in Editor.
	private void OnEnable( )
	{
		if( FogData.HasInstance )
		{
			FogData.Instance.OnChange += _UpdateFog;
		}
	}

	private void OnDisable( )
	{
		if( FogData.HasInstance )
		{
			FogData.Instance.OnChange -= _UpdateFog;
		}
	}
#endif

	private void Awake( )
	{
		_01_fog_depth_verticals_prop = Shader.PropertyToID( "_01FogDepthVerticals" );
		_fog_texture_prop = Shader.PropertyToID( "_FogTexture" );

		_rend = GetComponent&amp;amp;amp;amp;amp;lt;Renderer&amp;amp;amp;amp;amp;gt;( );
		materials = _rend.materials;

		_UpdateFog( );
	}

	private void Update( )
	{
		//If the z changed, update fog
		if( _previous_z != transform.position.z )
		{
			_UpdateFog( );
		}
	}

	private void LateUpdate( )
	{
		_previous_z = transform.position.z;
	}
#endregion Unity

#region LocalMethods	
	private bool _IsFogSetAndEnabled( )
	{
		return FogData.HasInstance &amp;amp;amp;amp;amp;amp;&amp;amp;amp;amp;amp;amp; FogData.Instance.Activated &amp;amp;amp;amp;amp;amp;&amp;amp;amp;amp;amp;amp; FogData.Instance.isActiveAndEnabled;
	}

	private void _UpdateFog( )
	{
		if( !_IsFogSetAndEnabled( ) )
		{
			SwitchEffectInShader( false );
		}
		else
		{
			FogData fog_data = FogData.Instance;
			float object_z = Mathf.Abs( transform.position.z );

			//If object is behind we consider front fog, otherwise we consider back fog
			Vector2 fog_limits = fog_data.fogBack;
			float depth_01 = 1;

			//If we our z position is less than 0, we use fog front.
			if( transform.position.z &amp;amp;amp;amp;amp;lt; 0 ) { fog_limits = fog_data.fogFront; depth_01 *= -1; } //Send properties if object is in fog boundaries. bool in_fog_zone = object_z &amp;amp;amp;amp;amp;gt;= fog_limits.x;
			if( in_fog_zone )
			{
				Texture2D fog_tex = fog_data.fogRampTexture;
				Vector2 fog_vertical = fog_data.verticalSplit;

				//This calculates the absolute coordinates for depth depending on FogBack and FogFront, and Z position of the object.
				depth_01 *= Mathf.Clamp01( 1f / ( fog_limits.y - fog_limits.x ) * ( object_z - fog_limits.x ) );

				//Send these properties to the shader, compressed in a Vector3, plus the texture
				_SetShaderFogProperties( new Vector3( depth_01, fog_vertical.x, fog_vertical.y ), fog_tex );
			}
			else
			{
				//If we are out the fog zone, deactivate the shader.
				SwitchEffectInShader( false );
			}
		}
	}

	//This sends the properties to the shader. The Vector with 3 properties of fog boundaries and coordinates, and the texture.
	private void _SetShaderFogProperties( Vector3 fog_depth_verticals_, Texture2D fog_texture_ )
	{
		SwitchEffectInShader( true );

		foreach( Material material in materials )
		{			
			material.SetVector( _01_fog_depth_verticals_prop, fog_depth_verticals_ );
			material.SetTexture( _fog_texture_prop, fog_texture_ );
		}
	}

	//Just activate and deactivate the effect using multi compile, so it's not compiled if it's not necessary.
	public void SwitchEffectInShader( bool activate_ )
	{
		if(activate_ == previous_activation_state)
		{
			return;
		}

		foreach( Material material in materials )
		{

			if( activate_ )
			{
				material.DisableKeyword( OFF_KEYWORD );
				material.EnableKeyword( ON_KEYWORD );
			}
			else
			{
				material.DisableKeyword( ON_KEYWORD );
				material.EnableKeyword( OFF_KEYWORD );
			}
		}

		previous_activation_state = activate_;
    }
#endregion LocalMethods
}

There are different ways to add this script to all objects automatically. The one we use is to make an editor script for SpriteRenderer that will add the script just when the SpriteRenderer component is created.

The shader

We need now to make our shader, the golden piece of this process. This shader has to be applied to a material, and that material will be set in our objects. Our previous tutorial about foliage waver shows how to do this, if you don’t know.

Shader "Moondrop/Fog"
{
    Properties
	{
        _MainTex( "Warm Texture", 2D ) = "black" { }

		_01FogDepthVerticals( "Linear Depth 01 And Verticals(RO)", Vector ) = ( 0.0, 0.0, 0.0, 0.0 )
		_FogTexture( "Fog Ramp Texture (RO)", 2D ) = "black" { }

		_Color( "Tint", Color ) = ( 1, 1, 1, 1 )

		[MaterialToggle] PixelSnap( "Pixel snap", Float ) = 0
	}

	SubShader
	{
        Tags
		{
            "Queue" = "Transparent"
			"IgnoreProjector" = "True"
			"PreviewType" = "Plane"
			"CanUseSpriteAtlas" = "True"
			"RenderType"="Transparent"
		}

		Cull Off
		Lighting Off
		Blend One OneMinusSrcAlpha
		ZWrite Off

		CGPROGRAM

		#pragma surface surf Lambert vertex:vert nofog keepalpha
		#pragma target 3.0
		#pragma multi_compile _PIXELSNAP_ON

		//This is necessary to deactivate fog effects if they are not used.
		#pragma multi_compile _FOG_OFF _FOG_ON

		sampler2D _MainTex;
        fixed4 _Color;

        struct Input
		{
            float2 uv_MainTex;
            #if defined( _FOG_ON )					
				float worldPosY;
			#endif
            fixed4 color;
        };

		//Just normal stuff
        void vert( inout appdata_full v, out Input o )
		{
            #if defined( PIXELSNAP_ON )
				v.vertex = UnityPixelSnap( v_.vertex );
            #endif
			
			UNITY_INITIALIZE_OUTPUT( Input, o );
            o.color = v.color * _Color;

			#if defined( _FOG_ON )	
				o.worldPosY = mul( unity_ObjectToWorld, v.vertex ).y;
			#endif
        }

		#if defined( _FOG_ON )
			/****************************************************************************/
			/**********************************FOG***************************************/
			/****************************************************************************/

			fixed4 _01FogDepthVerticals;
			sampler2D _FogTexture;

			float4 FogProperties( float world_pos_y_, float tex_columns_ )
			{
				float fog_bottom_column = tex_columns_;
				float fog_top_column = tex_columns_ + 0.25;
				float fog_depth = abs( _01FogDepthVerticals.x );

				//If the depth is negative, we are using front fog.
				fog_bottom_column += step( 0.f, -_01FogDepthVerticals.x ) * 0.5f;
				fog_top_column += step( 0.f, -_01FogDepthVerticals.x ) * 0.5f;

				//Calculate positions depending on depth, bottom and top.
				float2 fog_position_bottom = float2( fog_bottom_column, 1 - fog_depth );
				float4 bottom_FogTexture = tex2D( _FogTexture, fog_position_bottom );

				float2 fog_position_top = float2( fog_top_column, 1 - fog_depth );
				float4 top_FogTexture = tex2D( _FogTexture, fog_position_top );

				//Vertical position
				float vertical_pos = clamp( ( world_pos_y_ - _01FogDepthVerticals.y) / (_01FogDepthVerticals.z - _01FogDepthVerticals.y ), 0, 1 );

				//Blend bottom and top.
				return lerp( bottom_FogTexture, top_FogTexture, vertical_pos );
			}

			fixed4 CalculateFog( float world_pos_y_ )
			{
				//Calculate the color, alpha is the amount of fog.
				float4 fog_tex = FogProperties( world_pos_y_, 0.125  );
				float factor = fog_tex.a;
				return lerp( 0, fog_tex, factor );
			}
		#endif

		/****************************************************************************/
		/****************************************************************************/
		/****************************************************************************/

		
		void surf( Input i, inout SurfaceOutput o )
		{
            fixed4 color = tex2D( _MainTex, i.uv_MainTex ) * i.color;

            #if defined( _FOG_ON )					
				fixed4 fog_color = CalculateFog( i.worldPosY );

				//We have to remove the actual color of the object, the more fog it has, because we will increase emission.
				color.rgb *= ( 1 - fog_color.a );

				//We add the fog as emission. 
				//Since fog is not affected by any type of lights we need emission to become the color of the object.
				o.Emission = fog_color * color.a;
            #endif						

			o.Albedo = color.rgb * color.a ;
            o.Alpha = color.a;
        }
			
		ENDCG
	}
			
	FallBack "Diffuse"
}

This surface shader is pretty much standard, it only plays with color and emission depending on the fog properties and the position in the world.

Final results

Ok, everything is ready now.

I recommend putting the camera to perspective to better understand the results.
Let’s set the parameters of GameManager’s FogData like this to see nice results:

Move the object along the Z coordinate. Bravo!

You have a fully functional fog that will make your scenes beautifully colored!

You can download an entire Fog Unity Package with all necessary things built and ready.

Continuing what we started a couple of weeks ago, we have a new interview today.
Next developer: Karoline Skoglund Olsen, our artist. Let’s get influenced by her talent!

KarolineTell us who you are and what do you do on the team.

I am Karoline, the team’s artist. I started working here in September 2015, not long before  Alex did. I make the game’s art together with Owe, our lead designer.


What is the most difficult part of your job?

When there is a lot of work to be done, and all inspiration seems to elude me… I also have days where everything I make turns out not the way I want it to.


And the one you enjoy the most?

I love the days when I’m really inspired and everything just flows. When I can just sit day and night creating pieces I can feel proud of. It’s a wonderful feeling when you draw something and you think to yourself: “hey, this isn’t half bad!”.


Tell us how you make the game’s art:

What is your gear?

I work with Photoshop CC, and I use my trusted Wacom 13HD Cintiq. I also have a Wacom Intuos Pro Medium that I use at the office.


How do you make yourself comfortable before starting to draw?

Being the creative weird person that I am, I usually put on my pajama pants (when working at home), get myself a cup of coffee and just start to draw. It’s also nice to have some noise like music or Netflix in the background.


Can you explain the process you follow when you create a new piece of art?

It varies, sometimes I find pictures or art that inspire me in some way; other times I just start to draw and it just turns into something.


What is that amazing thing of Degrees of Separation you love most?

I really like the atmosphere of the game, the music and the art style comes together making it an almost magical experience, like a fairytale.


Why do you think Degrees of Separation will be a great success?

I think it will become a success because it’s so approachable. I’ve seen fathers play our demo with their daughters, siblings working together to solve the puzzles and couples discussing why their chosen character in the game obviously is the best character. I think that this is a game everyone would like; even people who don’t really see themselves as gamers.


What room would you add to the castle, and which use would you love for it to have?

I don’t know if there is something special I would like to add in the castle, but maybe a hidden room or something where you could have the possibility to unlock certain features or special levels. We were joking at a meeting, not so long ago, that it would be fun to add the possibility to unlock the “googly eye” version of the game if you got all the collectables. The “googly eye” version would be the exact same game, just that everything now has googly eyes on them, and I mean everything…


Share a screenshot you love, and tell us why. It can be inside Unity Editor, in-game, or showing your favorite software tool!

This is one of my favorite places in the game so far, this is after Ember and Rime fall down after the bridge breaks and land in the deep forest. I love the way the tree log bends and dampen their fall.

Ember Met Rime

Picture 1 of 1


A while ago I started to get quite annoyed at having to create instances of a class just to modify the values of an existing object, instead of directly editing the object fields.

float new_value = (Mathf.Sin( Time.time ) + 1) * 0.5f;

// Works
transform.position = new Vector3( transform.position.x, new_value, transform.position.z );
material.color = new Color( material.color.r, material.color.g, material.color.b, new_value );

// Does not work :(
// transform.position.y = new_value;
// material.color.a = new_value;

To me, it looks wrong to create a new instance when you just want to modify the object. The code gives the incorrect impression of intent, it’s verbose and leaves unnecessary information in the code. Yes, I’m a code nazi.

Luckily, I stumbled upon an article about so-called “Extension Methods” in C# (I hadn’t been using C# for too long at this point) and how you could use them in Unity! This opened up a whole new world of possibilities when it came to “modifying” Unity’s API to become more readable and understandable. And the best part is that it’s extremely easy!

Now, you might be reading this and thinking that using extension methods is obvious. Maybe it is, but I want to leave more traces of this in the context of Unity on the internet so future beginners can have a chance of finding it.

So here goes!

To make an extension (essentially extending a class) you simply create a new script and call it “ClassExtension” (ie ColorExtension, Vector2Extension, etc). Then you make that class static.

public static class ColorExtension {}

You then add methods that are “public static”. What’s special about these methods is that the first parameter has to be a reference to the object that is modified. When using an extended method C# automatically sends in this reference, but it has to be explicitly written into the function as a parameter.

It’s easier to show by example, so here’s an extended Color method I use all the time:

using UnityEngine;
 
public static class ColorExtension 
{
	public static Color WithAlpha( this Color color_, float alpha_ )
	{
		return new Color( color_.r, color_.g, color_.b, alpha_ );
	}
}

To use it, simply call the method on a Color object:

float theta = (Mathf.Sin( Time.time ) + 1) * 0.5f;
material.color = material.color.WithAlpha( theta );

And there you have it. Simple and powerful.

I haven’t explored this as much as I should’ve, but there are many convenient extensions you can make if you use your imagination.

Here are some of my favorite that I use every day:

using UnityEngine;

public static class GameObjectExtension
{
	public static T GetComponentOrAdd<T>( this GameObject go_ ) where T : Component
	{
		T component = go_.GetComponent<T>( );
		if( component == null )
		{
			component = go_.AddComponent<T>( );
		}
		return component;
	}

	public static T GetComponentOrDie<T>( this GameObject go_ ) where T : Component
	{
		T component = go_.GetComponent<T>( );
		if( component == null )
		{
			D.LogError( "Component " + typeof( T ) + " not found on GameOject." );
			Debug.Break( );
		}
		return component;
	}

	public static bool HasComponent<T>( this GameObject go_ ) where T : Component
	{
		return go_.GetComponent<T>( ) != null ? true : false;
	}
}
using UnityEngine;

public static class Vector2Extension 
{
	public static Vector2 WithX( this Vector2 vector_, float x_ )
	{
		return new Vector2( x_, vector_.y );
	}

	public static Vector2 WithY( this Vector2 vector_, float y_ )
	{
		return new Vector2( vector_.x, y_ );
	}
}
using UnityEngine;

public static class Vector3Extension 
{
	public static Vector3 WithX( this Vector3 vector_, float x_ )
	{
		return new Vector3( x_, vector_.y, vector_.z );
	}

	public static Vector3 WithY( this Vector3 vector_, float y_ )
	{
		return new Vector3( vector_.x, y_, vector_.z );
	}

	public static Vector3 WithZ( this Vector3 vector_, float z_ )
	{
		return new Vector3( vector_.x, vector_.y, z_ );
	}

	public static Vector3 WithXY( this Vector3 vector_, float x_, float y_ )
	{
		return new Vector3( x_, y_, vector_.z );
	}

	public static Vector3 WithXZ( this Vector3 vector_, float x_, float z_ )
	{
		return new Vector3( x_, vector_.y, z_ );
	}

	public static Vector3 WithYZ( this Vector3 vector_, float y_, float z_ )
	{
		return new Vector3( vector_.x, y_, z_ );
	}
}

Examples of how I use them:

// Prodecural mesh so we don’t care if the
// object already has the component or not
MeshRenderer renderer = gameObject.GetComponentOrAdd<MeshRenderer>( );
MeshFilter filter = gameObject.GetComponentOrAdd<MeshFilter>( );

// Need this for the object to make sense,
// so throw and error if it’s not there
ImportantComponent important = gameObject.GetComponentOrDie<ImportantComponent>( );

// I don’t care about the x and z value
// and just want to change y
float new_value = (Mathf.Sin( Time.time ) + 1) * 0.5f;
transform.position = transform.position.WithY( new_value );

Do you think this is useful for your work? Feel free to comment with your own ideas!

UPDATE

I’ve been informed that this article doesn’t have any pictures. I didn’t find anything relevant so here’s a cat:

WTF human!

Hello, hello, friends!

We prepared some small interviews with the members of Moondrop about how do they work and what do they think about Degrees Of Separation.
Alex is the first one dropping by. We hope you enjoy the reading.

Alex


Tell us who you are and what do you do on the team.

I am Alex Temina, and I’m the newest here. I started working at Moondrop in October 2015. Wow, it will be a year here soon, time flies.

I’m a programmer. I’m supposed to be the 50% of the programming team, even though we know that’s a nice lie. Andreas (our CEO) has been here making games for years, and he knows what he’s doing. We kind of share tasks, we don’t have specific roles inside the programming side, but right now he is more focused on the game mechanics and temperature, while I work on interactables and visuals. This is my dream job and makes me extremely happy, I hope I never get off the train of making videogames. :D


What is the most difficult part of your job?

Probably working with shaders. When I make new visuals, it feels like trying to walk down a path full of broken glass and I forgot my shoes at home. I will eventually cross and arrive to the other side, but it’s going to be painful, and I’ll bleed in the process. Yeah, the shoes are so far away, but maybe I should go get them first. The shoes are knowledge, of course. Sometimes, writing shaders feels like shooting in the dark, and at the same time I am making them, I am learning. Every new shader is tons of new knowledge for me, and lots of satisfaction when I succeed, but sometimes it’s quite frustrating. And it doesn’t help that the documentation is extremely poor everywhere, and the community help is very scarce, since the majority of Unity users don’t write shaders and use the standard ones.

But of course, none of that is as difficult as making our designer happy :D.


And the one you enjoy the most?

This may sound cheesy, but it would be shaders, also. The satisfaction of achieving what you are looking for is very high, and the feel of new horizons and areas to learn is very fulfilling. Also writing shaders feels more like making magic than writing normal scripts in Unity.
Of course, the moment when you are starting a new feature is always the funnier and most enjoyable. It doesn’t last too long, sadly.


What IDE (Integrated development environment) you use? What are your favourite addons and for it? How do they help you on your task?

We use Microsoft Visual Studio Community.

Regarding addons, I use overall two:

  • Code Maid: This wonderful addon cleans the code for you with many options, and you can bind it to save, so every time you save the document, it formats and cleans it: double new lines, unused namespaces and much more. It helps writing regions, too, and sorts lines if you have a bunch of variable declarations, and many more things that help you have your code clean and following the team standards.
  • Productivity Power Tools: This is a bunch of addons packed in one. It has many things, but my favourites are ‘reopen closed tab’, double click to maximize windows, and compressed lines that have only curly brackets. It has many more tools that I should explore.

I use other extensions like a code highlighter for shaders (NShader) and of course Visual Studio Tools for Unity.


What feature of Degrees of Separation you feel more proud of?

I would say two:

  • The one that I suffered more doing because it was one of my firsts, but I enjoyed the process and learned a lot: the glittering effect. Small bright spots that change depending on the movement on the camera in the cold side. That was hard learning shaders. Is not that I feel proud of the final product, but more of myself to finally achieve this back then.
  • The one I actually feel I did a good job would be Fog Shader and the Foliage Waver in terms of shaders, fog because it was a difficult task since Owe, our Lead Designer, wanted a very specific yet super beautiful thing. Regarding non shader work, I feel proud of all text related, from the actual mesh that shows text to the localization tools that I made to be able to have the game in different languages easily, even using automatic updates from a spreadsheet in Google Drive to get the text in a specific language.


What is that amazing thing of Degrees of Separation you love most?

I would say it is how beautiful the game is in many levels. Not only is the game art fantastic, but the temperature effect is outstanding, and it’s one of the things that calls on people’s attention and make them amazed. The fog and color decisions are perfect, and makes you remember those pictures forever.

On the other side, puzzles are very clever but not frustrating. You do the “aaah” expression when you realize what has to be done, and cooperation makes it even more satisfactory.


Why do you think Degrees of Separation will be a great success?

Because how accessible is to everyone, and how you easily get hooked on because of its beauty, the characters and the wish of solving puzzles to advance. The game is perfect to be played in the sofa with your little brother, your boyfriend or your daughter. It doesn’t require a person to be what is called a ‘gamer’ to enjoy it, and the story will keep people trapped ‘till the end.


What room would you add in the castle, and which use would you love for it to have?

I would love to have a room with the collectibles hanging in the wall and some statistics to know what you’ve missed and hints about where they are. That room will be more filled the more you advance in the game with some findings, notes with text, and more. I would love to be able to visit it as a small game gallery.


Share a screenshot you love, and tell us why. It can be inside Unity Editor, in game, or showing your favourite software tool!

Our Fog Shader offers many possibilities, you can even add any texture to be used to choose the colors that will be blended in the scene. I really love this, so I want to show you what we can achieve applying some random textures.

Using: Getting:
RimeBackground blue
Noise colors_both
EmberHouseWallFill rime


The rest of developers will do the interviews very soon. Stay tuned!

Hello, folks!

Since we are working hard and doing things that could be interesting for some of you (or maybe all :D), we thought it would be very nice to share stuff we’ve been making in a little bit more technical way.
You can use these tips and tutorials in your projects and tell us your experience with them, and even suggest us ways to help us improve.

We will start with what we call the “foliage waver”. It’s a rather simple shader that will twist and move your plants, leaves and anything you want to be affected by a force like wind, or the movement of the players.

Foliage Waver in action
We do get knowledge and influence from other people too, and in this case it all started from an awesome post in Unity forums by GambinoInd. Using his example shaders as a base, we modified it to our needs in Degrees of Separation. We simplified it for a use in 2D, added new variables, and introduced rotation of the plant with the waving.

Note: We made a nice Unity package with all the code and resources we are gonna create here. You’ll find it at the bottom of this post.

Making the foliage react to wind

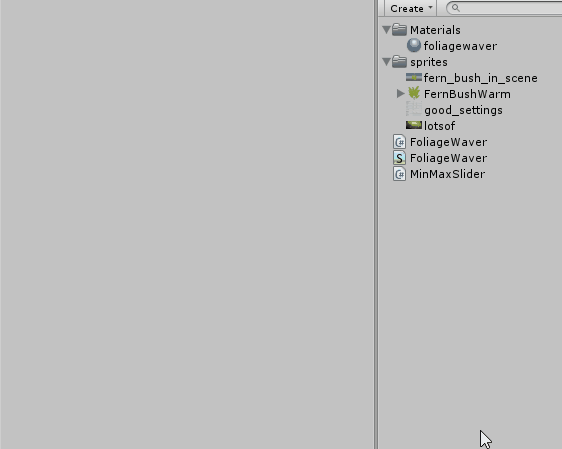
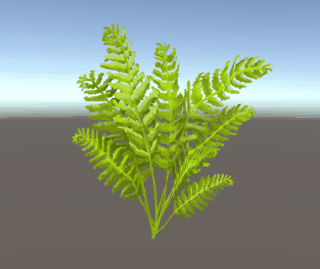
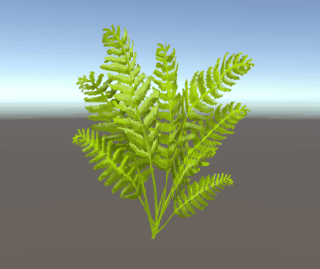
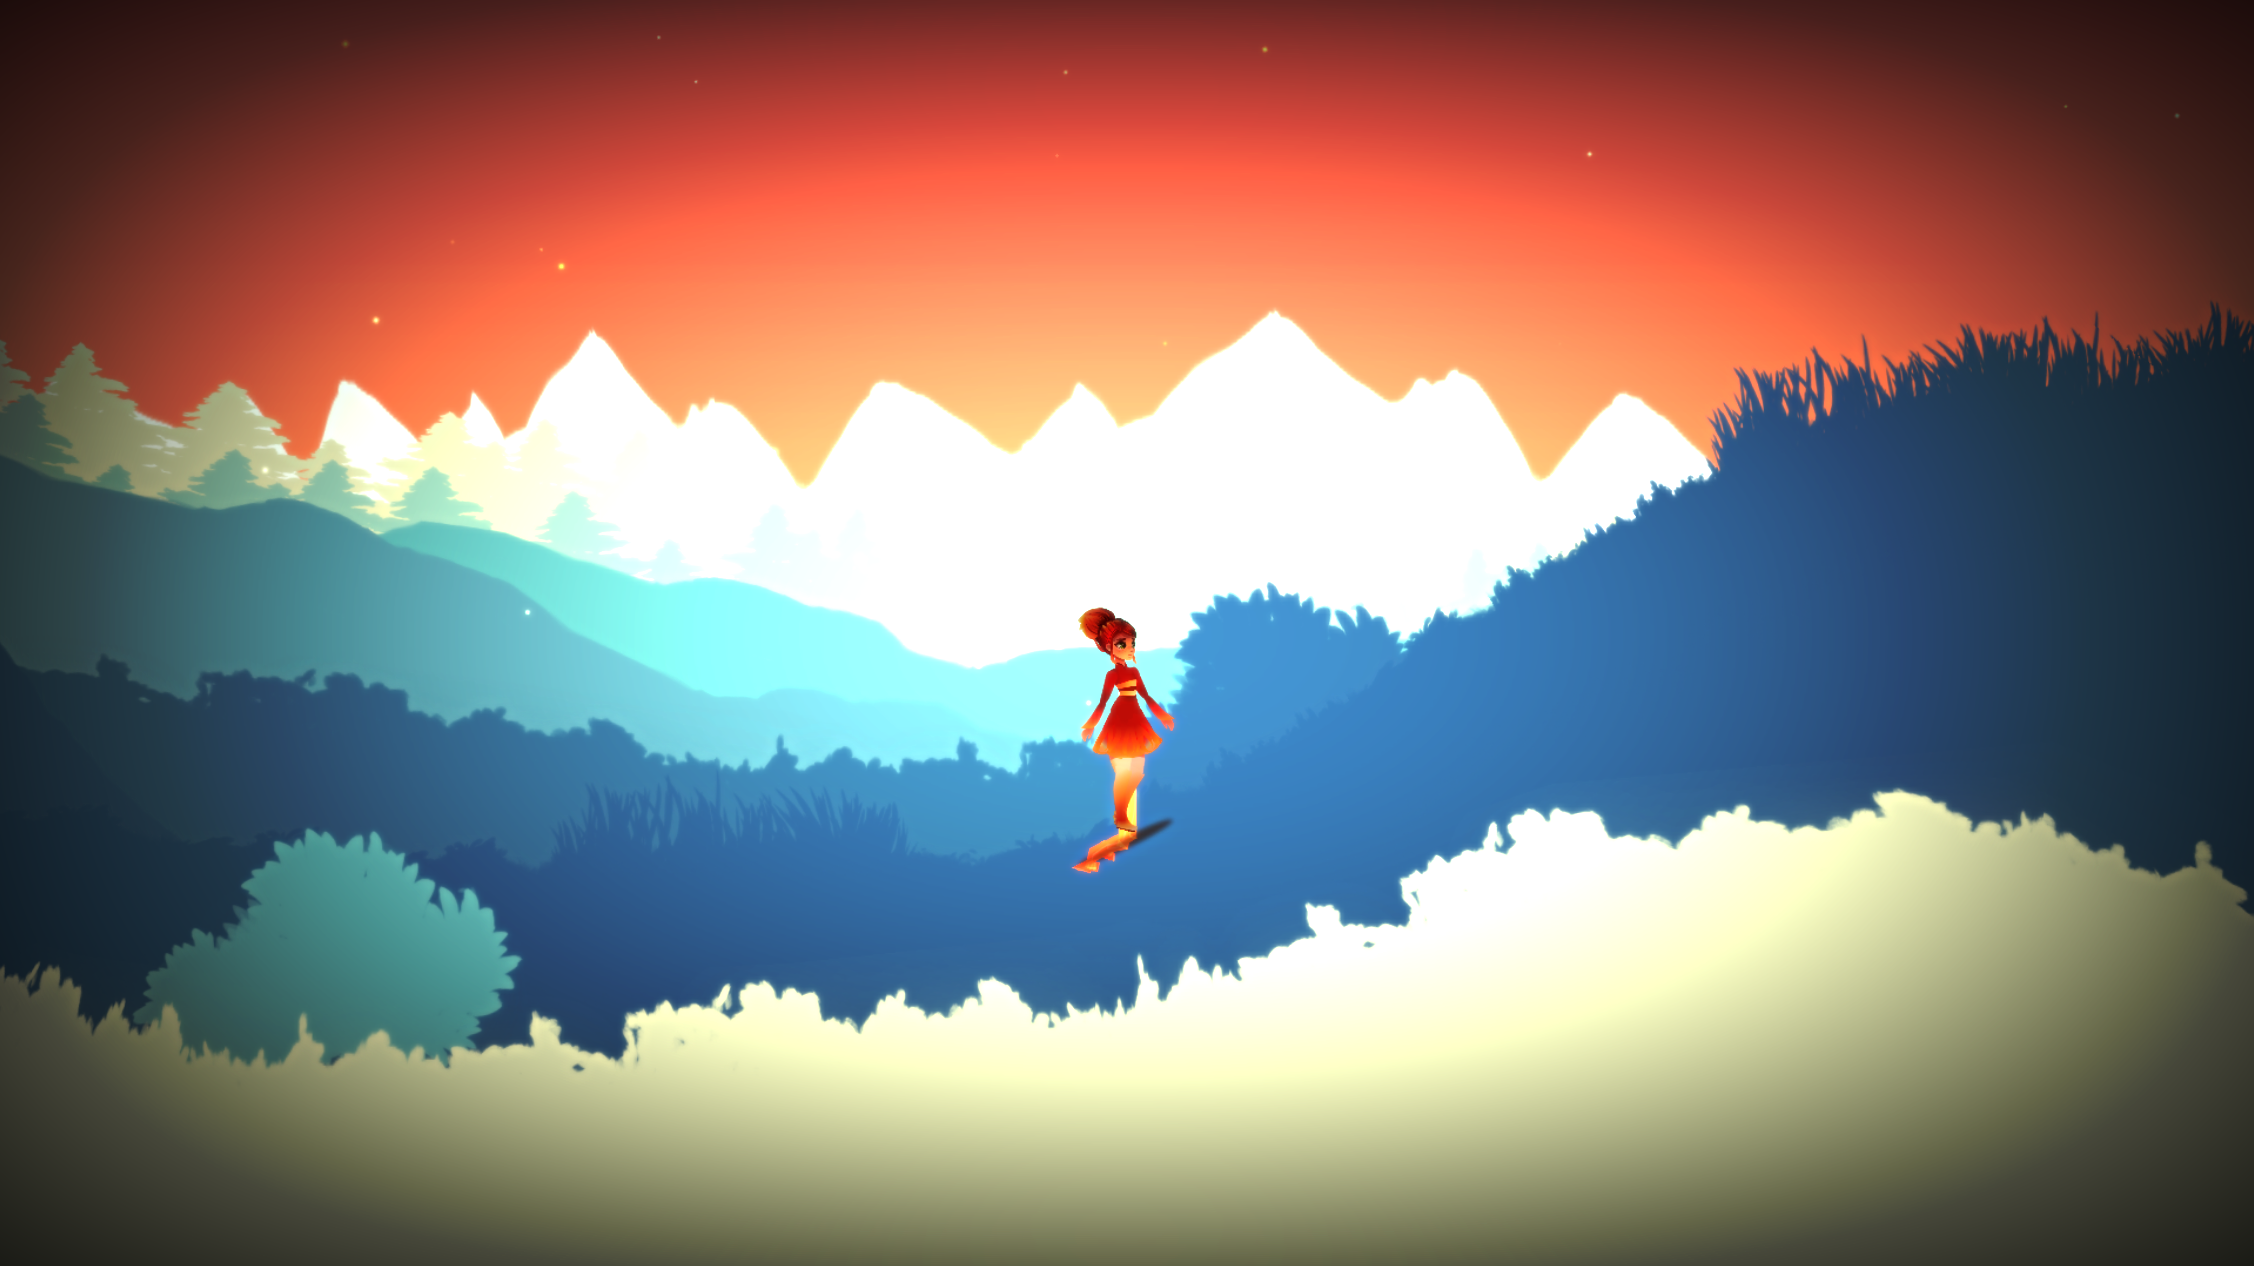
Let’s start. First, we need a sprite that represents a plant. We will use a fern bush, and will place it in the center of the screen:

Make a standard surface shader file and copy this into it:

Shader "Sprites/Waver"
{
    Properties
    {
        _MainTex("Texture", 2D) = "black" { }
        _Color("Tint", Color) = (1, 1, 1, 1)

		_Cutoff("Alpha Cutoff", Range(0,1)) = 0.5
    }
 
    SubShader
    {
		Tags
		{
			"Queue" = "AlphaTest"
			"IgnoreProjector" = "True"
			"PreviewType" = "Plane"
			"CanUseSpriteAtlas" = "True"
		}

		Cull Off
		Lighting Off
		Blend One OneMinusSrcAlpha
		CGPROGRAM

		#pragma surface surf Lambert vertex:vert nofog alphatest:_Cutoff
		#pragma target 3.0

		#include "ComposerEffects.cginc"
 
        sampler2D _MainTex;
 
        fixed4 _Color;
 
        struct Input
        {
            float2 uv_MainTex;
            fixed4 color;
            float3 worldPos;
        };          
 
        /****************************************************************************/
        /*************************************WAVING*********************************/
        /****************************************************************************/
 
 
        float4 _FoliageShake;
        float3 _FoliageZoneApplicationAndTime;
        float3 _FoliageRotation;
        float3 _FoliageTransformRotation;
 
        float4 _FastSin (float4 val) 
        {
            val = val * 6.408849 - 3.1415927;
            float4 r5 = val * val;
            float4 r1 = r5 * val;
            float4 r2 = r1 * r5;
            float4 r3 = r2 * r5;
 
            float4 sin7 = { 1, -0.16161616, 0.0083333, -0.00019841 };
         
            return val + r1 * sin7.y + r2 * sin7.z + r3 * sin7.w;
        }
 
 
        float4x4 _RotationMatrix( float angle_ )
        {
            float sinX = sin ( angle_ );
            float cosX = cos ( angle_ );
            float sinY = sin ( angle_ );
            float4x4 rotation_matrix = float4x4( cosX, -sinX, 0, 0,
                                                 sinY, cosX,  0, 0,
                                                 0,    0,     1, 0,
                                                 0,    0,     0, 1 );
            return rotation_matrix;
        }
 
 
        float2 _Rotate( float2 point_, float angle_ )
        {
            return mul( float4(point_.x, point_.y, 0, 0), _RotationMatrix( angle_ )  );
        }
 
        float2 _RotateAbout( float2 point_, float2 about_, float angle_ )
        {
            point_ -= about_;
            point_ = _Rotate( point_, angle_ );
            return  point_ + about_;
        }   
 
        float2 wave( float2 vertex_, float4 texcoord_, float2 world_pos_ )
        {
            //Constants
            const float4 wave_x_size = float4( 0.048, 0.06, 0.24, 0.096 );
            const float4 wave_speed = float4 ( 1.2, 2, 1.6, 4.8 ); 
            const float4 wave_x_move = float4( 0.024, 0.04, -0.12, 0.096 );
 
            //Getting properties from script
            int shake_freq = _FoliageShake.x;
            float shake_amount = _FoliageShake.y;
            float shake_bending = _FoliageShake.z;
            float shake_speed = _FoliageShake.w;
 
            float2 zone_application = float2( _FoliageZoneApplicationAndTime.x, _FoliageZoneApplicationAndTime.y );
            float time = _FoliageZoneApplicationAndTime.z;
     
            float2 rotation_pivot = float2( _FoliageRotation.x, _FoliageRotation.y );
            float rotation_amount = _FoliageRotation.z;
     
            float3 body_rotation = _FoliageTransformRotation;           
 
            //First let's rotate to put it in the origin;
            vertex_ = _Rotate(vertex_, float2( -body_rotation.z, -body_rotation.y ) );
    
            //Wave calculations
            float4 waves = vertex_.x * wave_x_size;     
            waves += time * shake_speed * wave_speed;
            waves = frac( waves );  
                 
            float coord = ( texcoord_.y - zone_application.x)  / ( zone_application.y - zone_application.x );
            coord = clamp( coord, 0, 1 );
 
            float wave_amount = coord * shake_bending;
            float4 s = _FastSin ( waves ); 
            s *= wave_amount; 
            s *= normalize( wave_speed );   
            s *= shake_freq  ? s : pow( s, 3 );
     
            float3 wave_move = float3 ( 0, 0, 0 );
            wave_move.x = dot( s, wave_x_move );
            vertex_.x += mul( (float3x3)_World2Object, wave_move ).x *  shake_amount;
            vertex_ = _RotateAbout( vertex_, float2( rotation_pivot.x - world_pos_.x, rotation_pivot.y - world_pos_.y   ), rotation_amount * texcoord_.y );         
 
            //Rotate back
            vertex_ = _Rotate( vertex_, float2( body_rotation.z, body_rotation.y ) );
 
            return vertex_;
        }
 
        /****************************************************************************/
        /****************************************************************************/
        /****************************************************************************/
 
        void vert( inout appdata_full v, out Input o )
        {
            #if defined( PIXELSNAP_ON )
                v.vertex = UnityPixelSnap( v_.vertex );
            #endif
 
            UNITY_INITIALIZE_OUTPUT( Input, o );
            o.color = v.color * _Color;
            o.worldPos = mul( _Object2World, v.vertex ); 
 
            //Plant waving          
            v.vertex.xy = wave( v.vertex.xy, v.texcoord, o.worldPos );
                 
        }
 
        void surf( Input i, inout SurfaceOutput o )
        {
            fixed4 color = tex2D( _MainTex, i.uv_MainTex ) * i.color;
 
            o.Albedo = color.rgb * color.a;
            o.Alpha =  color.a;
        }
        ENDCG
    }
 
    FallBack "Diffuse"
}

We have to make a script that gets the information we need from the user, and send it to the shader we just wrote. Make a script like this one, and add it as a component on the object you want to wave:

using UnityEngine;

[RequireComponent( typeof( SpriteRenderer ) )]
[RequireComponent( typeof( BoxCollider2D ) )]
public class FoliageWaver : MonoBehaviour
{
	#region InspectorFields
	[Header( "Wave Properties" )]
	[MinMaxSlider( 0, 1 )]
	public Vector2 waveDissipation = new Vector2( 0.54f, 0.57f );

	[MinMaxSlider( 0, 1 )]
	public Vector2 waveFriction = new Vector2( 0.35f, 0.4f );

	[MinMaxSlider( 0f, 2f )]
	public Vector2 shakeBending = new Vector2( 1.1f, 1.15f );

	[MinMaxSlider( 0f, 4f )]
	public Vector2 shakeSpeed = new Vector2( 3.3f, 3.8f );

	[MinMaxSlider( 0f, 1f )]
	public Vector2 coordinateApplication = new Vector2( 0.02f, 1f );

	[Header( "Rotation Properties" )]
	public Vector2 rotationPivot = new Vector2( 0f, 0f );

	[MinMaxSlider( 0f, 1f )]
	public Vector2 rotationStrength = new Vector2( 0.038f, 0.21f );

	[Range( 0f, 1f )]
	public float rotationLimits = 0.04f;

	[Range( 1f, 6f )]
	public float rotationWaveSpeed = 0.2f;

	[Range( 0f, 5f )]
	public float rotationBounciness = 0.5f;

	[Header( "Others" )]
	public bool underWater = false;
	#endregion InspectorFields

	#region PrivateFields
	private float _wave_scew = 0f;
	private float _wave_force = 0f;

	private Renderer _rend;

	private float _wave_dissipation;
	private float _wave_friction;
	private float _shake_bending;
	private float _shake_speed;
	private float _rotation_strength;

	private float _wave_dissipation_rn = 0.5f;
	private float _wave_friction_rn = 0.5f;
	private float _shake_bending_rn = 0.5f;
	private float _shake_speed_rn = 0.5f;
	private float _rotation_strength_rn = 0.5f;

	private float _time;
	private float _rot_amount;
	private Vector2 _real_pivot;

	//shader property ids
	private int _foliage_shake_prop;

	private int _foliage_zone_application_and_time;
	private int _foliage_rotation_prop;
	private int _foliage_transform_rotation_prop;
	#endregion PrivateFields

	#region Unity
	private void Awake( )
	{
		_real_pivot = rotationPivot;

		//Using ID's to send properties to the shader
		_foliage_shake_prop = Shader.PropertyToID( "_FoliageShake" );
		_foliage_zone_application_and_time = Shader.PropertyToID( "_FoliageZoneApplicationAndTime" );
		_foliage_rotation_prop = Shader.PropertyToID( "_FoliageRotation" );
		_foliage_transform_rotation_prop = Shader.PropertyToID( "_FoliageTransformRotation" );

		_rend = GetComponent&amp;lt;Renderer&amp;gt;( );

		//Makes a calculation of the numbers given min and max of the range in inspector
		_CalculateRandomNumbers( );
		_RecalculateValues( );
	}

	private void FixedUpdate( )
	{
		//Taking time
		_time += Time.fixedDeltaTime;

		//get velocity of the wind that will move the plant and add it to the total force
		if( WeatherData.Instance &amp;amp;&amp;amp; WeatherData.Instance.isActiveAndEnabled &amp;amp;&amp;amp; WeatherData.Instance.windProperties != null &amp;amp;&amp;amp; WeatherData.Instance.activateWind )
		{
			_wave_force += WeatherData.Instance.windProperties.randomVelocity.x * 0.1f;
		}

		//The skew accumulates the force applied over time. 
		_wave_scew += _wave_force;

		//Friction and dissipation makes the plant go back to initial position little by little.
		//The more friction, the more difficult to make the plant move with the force
		float friction_application = ( 1 - _wave_friction );
		_wave_scew *= friction_application;

		//The more dissipation, the quickest the plant goes back to its initial position
		float dissipation_application = ( 1 - ( 0.1f * _wave_dissipation ) );
		_wave_force *= dissipation_application;

		//Rotation of the plant arount the pivot
		int direction = _wave_scew &amp;gt; 0 ? 1 : -1;
		float rot_amount = _CalculateRotationAmount( friction_application );
		Vector3 transform_rotation = Mathf.Deg2Rad * transform.rotation.eulerAngles;

		//Calculations for material before applying to shader
		_real_pivot = new Vector2( rotationPivot.x * direction, rotationPivot.y );
		Vector2 rotation_pivot = ( Vector2 )transform.position + ( _real_pivot );
		float time_for_shader = _time / 20f;
		Vector4 shake = new Vector4( underWater ? 1 : 0, _wave_scew, _shake_bending, _shake_speed );
		Vector3 zone_application_and_time = new Vector3( coordinateApplication.x, coordinateApplication.y, time_for_shader );
		Vector3 rotation = new Vector3( rotation_pivot.x, rotation_pivot.y, rot_amount );

		foreach( Material material in _rend.materials )
		{
			material.SetVector( _foliage_shake_prop, shake );
			material.SetVector( _foliage_zone_application_and_time, zone_application_and_time );
			material.SetVector( _foliage_rotation_prop, rotation );
			material.SetVector( _foliage_transform_rotation_prop, transform_rotation );
		}

		//Recalculates in editor to be able to adjust the waver in real time
#if UNITY_EDITOR
		_RecalculateValues( );
#endif
	}
	#endregion Unity

	#region LocalMethods
	private float _PickRandomBetween( Vector2 min_max_, float random_seed_ )
	{
		//Typical percentage calculation
		return min_max_.x + random_seed_ * ( min_max_.y - min_max_.x );
	}

	private void _RecalculateValues( )
	{
		//RePicks the value with the same seed - same minmax will return same value until the game restarts
		_wave_friction = _PickRandomBetween( waveFriction, _wave_friction_rn );
		_wave_dissipation = _PickRandomBetween( waveDissipation, _wave_dissipation_rn );
		_shake_bending = _PickRandomBetween( shakeBending, _shake_bending_rn );
		_shake_speed = _PickRandomBetween( shakeSpeed, _shake_speed_rn );
		_rotation_strength = _PickRandomBetween( rotationStrength, _rotation_strength_rn );
	}

	private void _CalculateRandomNumbers( )
	{
		//Stores random values to take a number between min and max for the properties
		_wave_dissipation_rn = Random.value;
		_wave_friction_rn = Random.value;
		_shake_bending_rn = Random.value;
		_shake_speed_rn = Random.value;
		_rotation_strength_rn = Random.value;
	}

	private float _CalculateRotationAmount( float friction_ )
	{
		//Calculates how much the plant should rotate depending on the force, bounciness and speed.
		_rot_amount += _wave_force * _rotation_strength * 0.05f;
		_rot_amount += ( 0.005f * rotationBounciness * Mathf.Sin( _wave_force * rotationWaveSpeed ) + _wave_force * 0.005f );

		//Makes friction affect
		_rot_amount *= friction_;

		//Don't rotate further than limits
		_rot_amount = Mathf.Clamp( _rot_amount, -rotationLimits, rotationLimits );

		return _rot_amount;
	}
	#endregion LocalMethods
}

Multiple fields of the script have a MinMaxSlider attribute, a property that allows setting 2 floats in the shape of a Vector2. In our case we use it to pick a random amount between these 2 numbers, as you can see in the code inside FoliageWaver.cs. This way, if we have a lot of plants together, they will move a bit differently. You can just change this and ask for a constant float to the user, or ask for 2 floats, the min and the max. Nevertheless, the code for the attribute is:

using UnityEditor;
using UnityEngine;

public class MinMaxSliderAttribute : PropertyAttribute
{
	public readonly float max;
	public readonly float min;

	public MinMaxSliderAttribute( float min_, float max_ )
	{
		min = min_;
		max = max_;
	}
}

[CustomPropertyDrawer( typeof( MinMaxSliderAttribute ) )]
internal class MinMaxSliderPropertyDrawer : PropertyDrawer
{
	private const int _control_height = 16;

	public override float GetPropertyHeight( SerializedProperty property_, GUIContent label_ )
	{
		return base.GetPropertyHeight( property_, label_ ) + _control_height * 2f;
	}

	public override void OnGUI( Rect position_, SerializedProperty property_, GUIContent label_ )
	{
		label_ = EditorGUI.BeginProperty( position_, label_, property_ );

		if( property_.propertyType == SerializedPropertyType.Vector2 )
		{
			Vector2 range = property_.vector2Value;
			MinMaxSliderAttribute attr = attribute as MinMaxSliderAttribute;

			range.x = Mathf.Max( range.x, attr.min );
			range.y = Mathf.Min( range.y, attr.max );

			range = EditorGUI.Vector2Field( position_, label_, range );

			Rect position = EditorGUI.IndentedRect( position_ );
			position.y += _control_height * 1.5f;
			position.height = _control_height + 5;
			EditorGUI.MinMaxSlider( position, ref range.x, ref range.y, attr.min, attr.max );
						
			property_.vector2Value = range;			
		}
		else
		{
			EditorGUI.LabelField( position_, label_, "Use only with Vector2" );
		}

		EditorGUI.EndProperty( );
	}
}

The sprite renderer attached to the object we want to wave needs to use a Material with the shader we created before. Just make a new material and select our shader from the dropdown in the material’s inspector. Then go to the sprite inspector and drag and drop the material into the renderer component.

pick the shader in your new material

Once the Material with the shader is applied, and the FoliageWaver component added, we should have this in our inspector:

The waver fields

This script is going to expose some variables that will tweak the way our waving behaves:

  • Wave Dissipation: This controls how long the plant will keep waving after the force is applied.
  • Wave Friction: The bigger it is, the most difficult for the plant to wave.
  • Shake Bending: This controls how much the plant waves. A big number will result in funky moves.
  • Shake Speed: How fast the wave travels.
  • Coordinate Application: This represents where in the plant the wave will be applied. if the min is 0 and the max is 1, it will be applied in the entire plant, but always incrementally from the bottom to the top. If the min is 0.5 and the max is 1, the wave will be applied only from the middle of the plant to the top. Take in account that we are moving vertices, and these are connected, so it is inevitable that the entire plant is moving at some point. this happens also in real life.
  • Rotation Pivot: The pivot around which the plant rotates. You can draw gizmos to see the pivot in the editor. For better results, set the pivot X to 0, and Y a bit below the center.
  • Rotation Strength: How strong the rotation is, always depending on the force applied.
  • Rotation Limits: How far the rotation goes. This number should be low.
  • Rotation Wave Speed:  How fast the rotation wave or bounciness is produced.
  • Rotation Bounciness: If the rotation should be constant or bounce a bit.
  • UnderWater: If you want to add waving in plants under water, the wave is different, smoother. Toggle this and it will behave more correctly underwater.

The Rotation Wave Speed and Bounciness are two properties that can be considered a bit experimental. Put them to 0 or very low if your rotation is a bit funky.

A nice setting for the plant would be like this:

Now, if we did everything correctly and play the scene, our bush should wave.
a plant waving with a constant force.

Awesome!

But now it’s just waving constantly because we’re applying a force of 0.2f, hardcoded into the script.

//Update method code ...
wave_force += 0.2f;
//Update method code...

The wind generators

It would be much better to have some options to control this constant force, and, furthermore, add external forces that will play with the wave in very interesting ways:

  • WindMachine: Object that throws wind waves with certain frequency. These waves will make foliage move.
  • Player movement: When player goes through foliage, the speed will trigger waving.
  • Weather: We have a global, constant wind that affects the entire scene. This makes foliage wave all the time, but changing strength and direction with a specific frequency.

For simplicity here, we’ll skip the first two and focus on the global wind, part of the weather.

We need a GameManager object in our scene, or some other object that holds effects or global values. Make a script called WeatherData and add it as a component there:

using System;
using UnityEngine;

public class WindProperties
{
	#region Actions
	public event Action OnPropertiesChanged;
	#endregion Actions

	#region PrivateMethods
	private float _time_passed;

	private Vector2 _frequency;
	private Vector2 _min_velocity;
	private Vector2 _max_velocity;

	private float _random_frequency;
	private Vector2 _random_velocity;

	private float _ran_for_frequency;
	private Vector2 _ran_for_velocity;
	#endregion PrivateMethods

	#region Accessors
	public Vector2 randomVelocity
	{
		get
		{
			return _random_velocity;
		}
	}
	#endregion Accessors

	#region Constructor
	public WindProperties( Vector2 frequency_, Vector2 min_velocity_, Vector2 max_velocity_ )
	{
		ResetProperties( frequency_, min_velocity_, max_velocity_ );
	}

	#endregion Constructor

	#region PublicMethods
	public void ResetProperties( Vector2 frequency_, Vector2 min_velocity_, Vector2 max_velocity_ )
	{
		//If something changed, assign it again and make recalculations
		bool something_changed = frequency_ != _frequency || min_velocity_ != _min_velocity || max_velocity_ != _max_velocity;

		if( something_changed )
		{
			_frequency = frequency_;
			_min_velocity = min_velocity_;
			_max_velocity = max_velocity_;

			_CalculateRandomNumbers( );
			_RecalculatePropertyValues( );
		}
	}

	public void Update( )
	{
		_time_passed += Time.deltaTime;

		//If more time than the frequency set passed, we recalculate numbers again to make wind organic and change with time (frequency)
		if( ( _frequency.x &amp;gt; 0f || _frequency.y &amp;gt; 0f ) &amp;amp;&amp;amp; _time_passed &amp;gt;= _random_frequency )
		{
			_CalculateRandomNumbers( );
			_RecalculatePropertyValues( );

			_time_passed = 0f;

			if( OnPropertiesChanged != null )
			{
				OnPropertiesChanged( );
			}
		}
	}

	#endregion PublicMethods

	#region PrivateMethods
	private void _CalculateRandomNumbers( )
	{
		_ran_for_frequency = UnityEngine.Random.value;
		_ran_for_velocity = new Vector2( UnityEngine.Random.value, UnityEngine.Random.value );
	}

	private float _PickRandomBetween( Vector2 min_max_, float precreated_random_ )
	{
		return min_max_.x + precreated_random_ * ( min_max_.y - min_max_.x );
	}

	private Vector2 _PickRandomBetweenVectors( Vector2 min_, Vector2 max_, Vector2 precreated_randoms_ )
	{
		float x = min_.x + precreated_randoms_.x * ( max_.x - min_.x );
		float y = min_.y + precreated_randoms_.y * ( max_.y - min_.y );

		return new Vector2( x, y );
	}

	private void _RecalculatePropertyValues( )
	{
		_random_velocity = _PickRandomBetweenVectors( _min_velocity, _max_velocity, _ran_for_velocity );
		_random_frequency = _PickRandomBetween( _frequency, _ran_for_frequency );
	}

	#endregion PrivateMethods
}

public class WeatherData : Singleton&amp;lt;WeatherData&amp;gt;
{
	#region Actions
	public event Action OnChange;

	#endregion Actions

	#region InspectorField
	[Header( "Wind" )]
	public bool activateWind;

	[MinMaxSlider( 0f, 10f )]
	public Vector2 minMaxFrequency;

	public Vector2 minVelocity;
	public Vector2 maxVelocity;
	#endregion InspectorField

	#region Accessors
	public WindProperties windProperties
	{
		get
		{
			return _wind;
		}
	}
	#endregion Accessors

	#region privateFields
	private WindProperties _wind;

	//previous
	private Vector2 _previous_min_velocity;
	private Vector2 _previous_max_velocity;
	private Vector2 _previous_min_max_frequency;
	private bool _previous_activate_wind;
	#endregion privateFields

	#region Unity
#if UNITY_EDITOR
	//If we enable or disable the component, we have to update
	private void OnEnable( )
	{
		if( OnChange != null )
		{
			OnChange( );
		}
	}

	private void OnDisable( )
	{
		if( OnChange != null )
		{
			OnChange( );
		}
	}
#endif

	private void Awake( )
	{
		if( activateWind )
		{
			_wind = new WindProperties( minMaxFrequency, minVelocity, maxVelocity );
		}
	}

	private void Update( )
	{
		//Only in Unity Editor, if something changes we have to get those values and pick a random between them again
#if UNITY_EDITOR
		bool something_changed = _previous_activate_wind != activateWind;

		if( activateWind )
		{
			something_changed |= minVelocity != _previous_min_velocity || maxVelocity != _previous_max_velocity || minMaxFrequency != _previous_min_max_frequency;

			if( something_changed )
			{
				_wind = new WindProperties( minMaxFrequency, minVelocity, maxVelocity );
			}

			_wind.Update( );
		}
#endif
	}

	private void LateUpdate( )
	{
		//Set new values as previous
		_previous_min_velocity = minVelocity;
		_previous_max_velocity = maxVelocity;
		_previous_min_max_frequency = minMaxFrequency;
		_previous_activate_wind = activateWind;
	}
	#endregion Unity
}

The Weather Data is a Singleton, a class that will handle things in our game that have one and only one instance. Singletons make our life easier with convenient access to this objects from anywhere, as if they were static classes. Another thing to note is that our wind has a Vector velocity and not just speed, so it can be used in 2 dimensions. In the case of our shader, only the x coordinate of the velocity will be applied.

Add our WeatherData on the GameManager object we created on the scene:

MinMaxFrequency will make the velocity change randomly every ‘n’ seconds, ‘n’ being a random number between min and max frequency.

Now, instead of adding a constant value to the force applied to the plant, we will add the velocity of our global wind. In FoliageWaver.cs:

	private void FixedUpdate( )
	{
		//Time
		_time += Time.fixedDeltaTime;
		if( WeatherData.Instance &amp;amp;&amp;amp; WeatherData.Instance.isActiveAndEnabled &amp;amp;&amp;amp; WeatherData.Instance.activateWind )
		{

			wave_force += WeatherData.Instance.windProperties.randomVelocity.x * 0.1f;
		}
		_wave_scew += wave_force;
//... more Update method code

We can tweak our wind component and it will make our bush wave differently!

Plant waving with global Wind

Now you can add all this into your projects and enjoy the breeze!

Foliage Waver complete
You can find a package with all the code, an sprite and an example scene here:
FoliageWaver unity package